
A few months ago, I bought two old wooden filing cabinets on the cheap from one of my favorite consignment stores here in town. They had been painted white – seemingly a long time ago – and were distressed from use, and I loved that. I pictured some adorable icons or patterns painted on them in bold colors, and cute drawers pulls, and voila! Better, cuter and more unique storage in my son’s room.
((Before I go tooting my own horn here about how great I think they look now that they’re finished, I will say that I brought them home, cleaned them up, and then they sat in my garage for a month. Then I sketched the pictures/patterns, and they sat in the garage for a month. Then I painted a few drawers. Then… you get the idea.))
The first thing that was super helpful was my tip from my friend Lauren about using chalk paint. No sanding or primer necessary. What a time saver! I used Annie Sloan brand, and it was fabulous. Went on like a dream, and two coats later, I had the bold color I wanted.


Whoever had painted the cabinets white did a very eh job, so when I took off the industrial-looking handles, I had to have Hubby sand around the area to make it smooth. Then I just kept a-painting…

A little Annie Sloan wax coat on the outside, a little bit of buffing, and the drawers were all finished!
The insides of the drawers were a little rough, so I wanted to line them. Don’t want those baby clothes and swaddles to get snagged! When I went to Wal-Mart there was nothing really whimsical, so I went with… wood grain? I know. Terrible. But it won’t really be seen.
One sad point about the Contact drawer liner… it didn’t stick very well to the unfinished wood, so I ended up gluing a little bit underneath it. Extra work, but ah well. Such is to be expected when you start a project like this, right?

You can see the outer space theme… and I think they fit well! I actually want to reorder the drawers – Hubby put them in out of order. And we still need to attach the drawer pulls. But I couldn’t wait to put them in there, and couldn’t wait to share the project! However, once I got them on either side of the changing table, it seemed like there was too much extra space. So I swapped the changing table and crib!
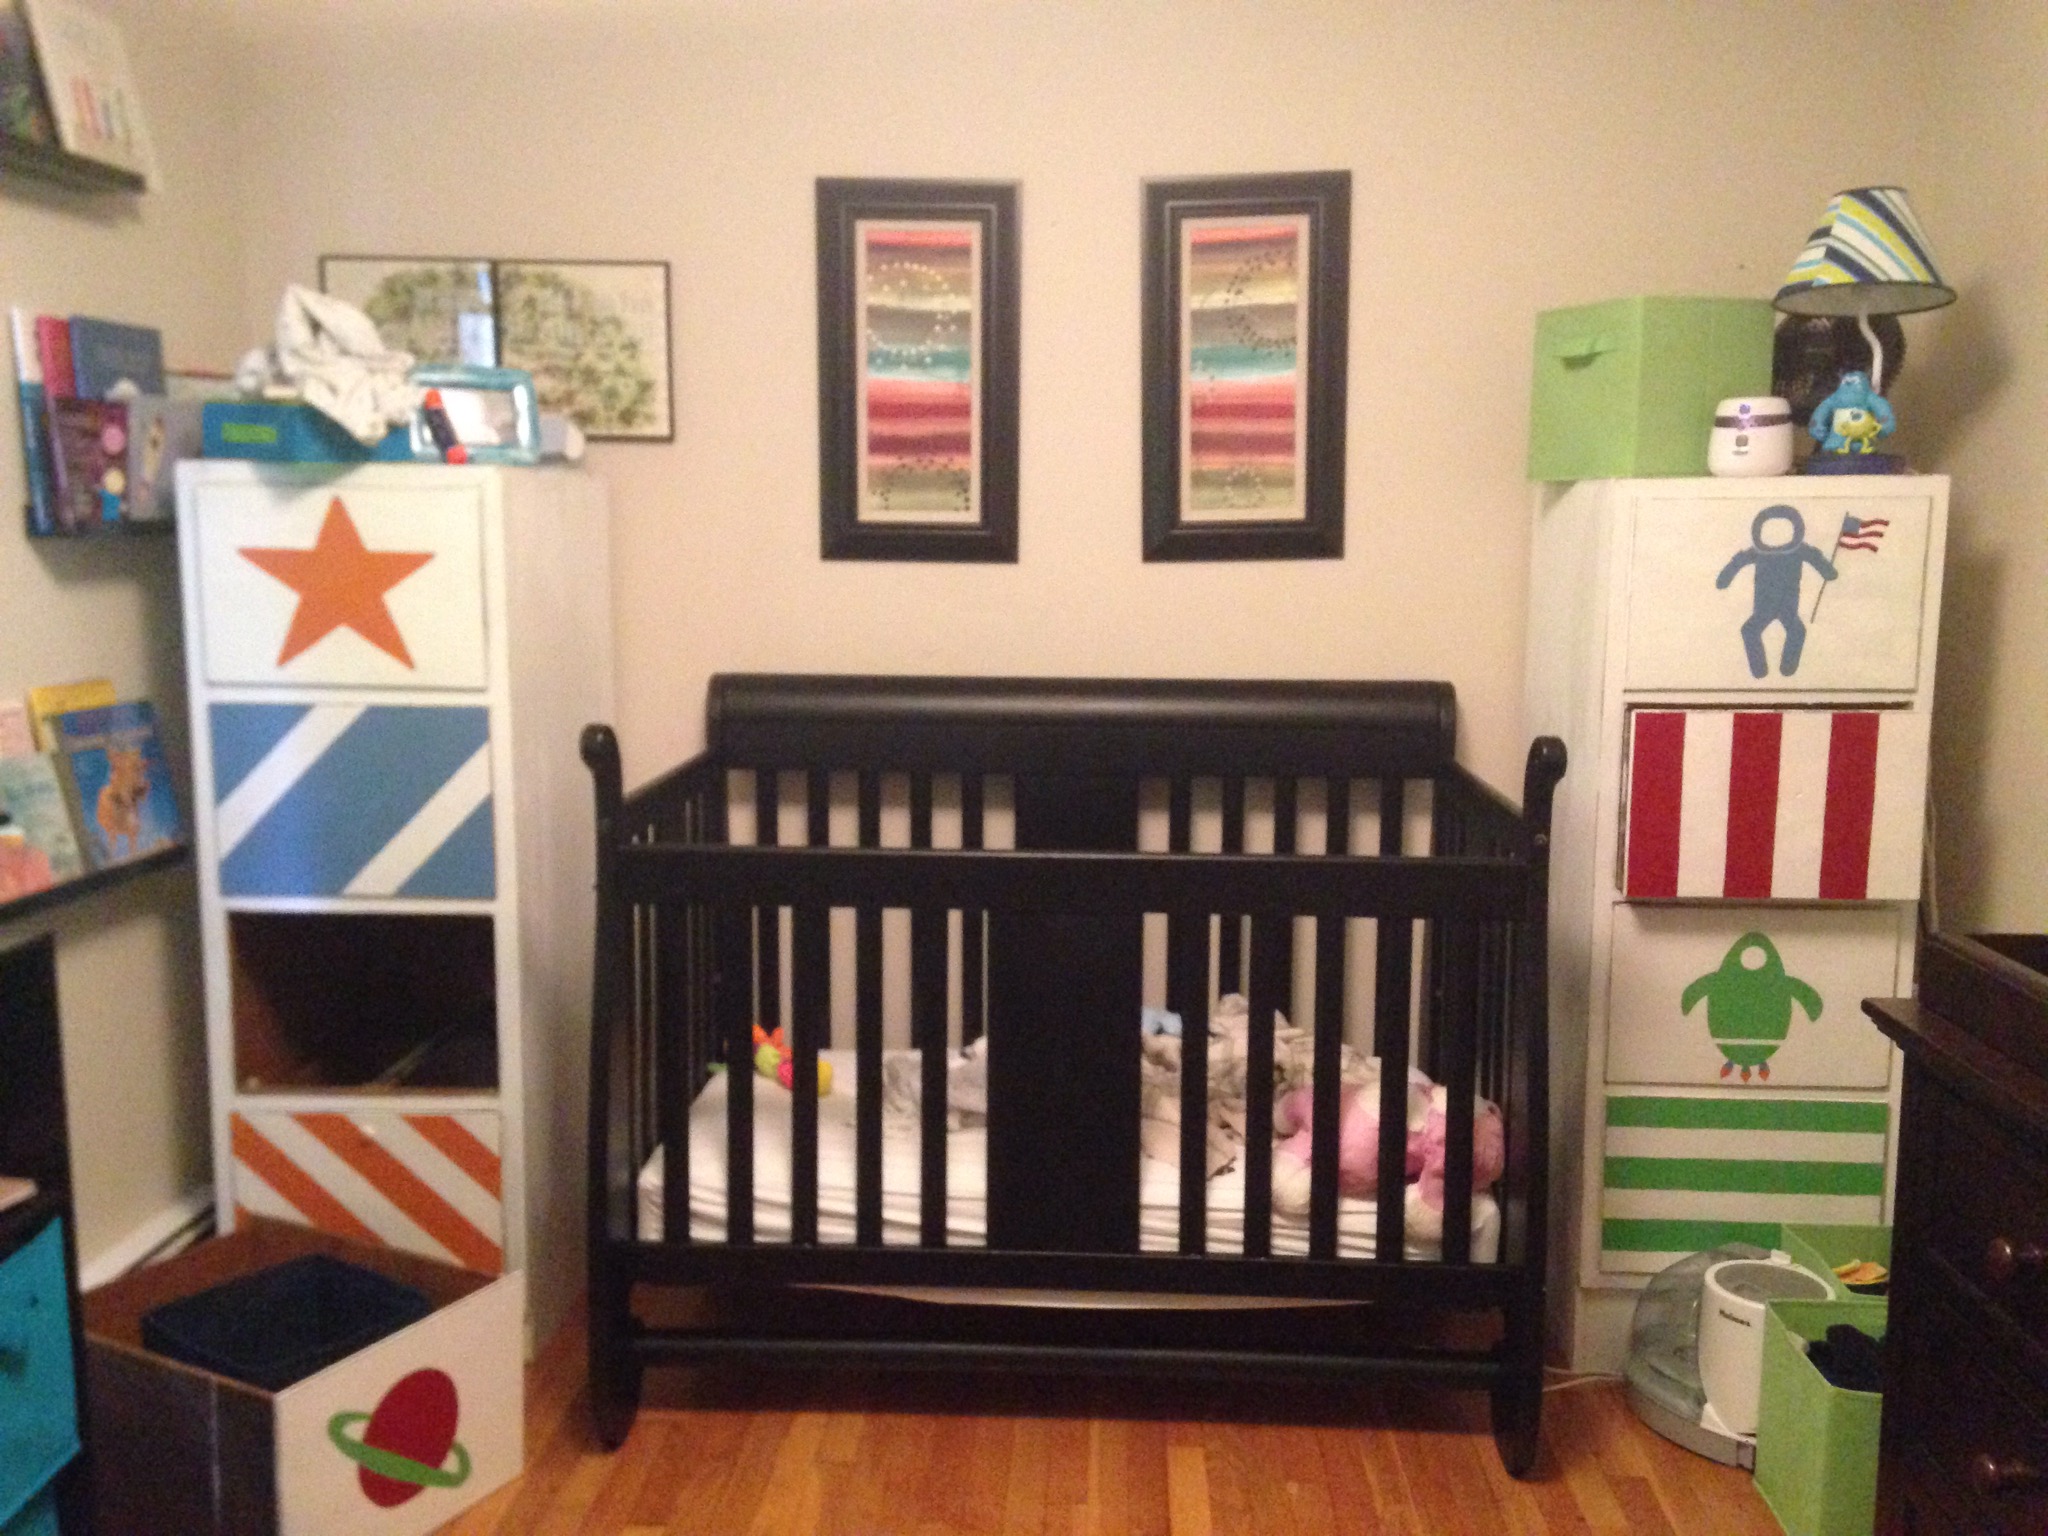
Much better, right? I like the scale a lot more. And it made the whole room feel bigger right when you walked in. I’m pretty pleased with the effect, and now I’m all ready to finish organizing!
**A big thanks to Hubby for the heavy lifting, to Lauren for helping wax, and to my mom, who helped with the sketching and painting!**
What DIY projects have you done recently? Have you ever refinished or upcycled some old furniture?
